Yes, I caught on to the craze. These are just so darn cute!!! I found a really cute free pattern on Ravelry. Hers is much cuter than mine, but I still like it
Showing posts with label Quick and Easy. Show all posts
Tuesday, May 22, 2012
Saturday, January 7, 2012
Basketweave Earwarmer
Labels:
crochet,
headband,
patterns,
Quick and Easy
Tuesday, November 15, 2011
The start of Christmas Projects
These are only a couple of projects I've been working on for Christmas gifts. These are the only ones I can post right now (in case the recipient would look on here)
The first one is a bear I made for Bailey for her birthday. She loves dolls and stuffed animals so I thought it would be fun to make up a pattern and I crocheted it out of some yarn I got from Grandma Brown.
It's not fabulous but I think it'll be fun for her.
This is a pattern I found and loved. The only problem is I picked horrible colors. I love the pattern though and it was so easy to make. I'll probably use this pattern again.
Labels:
afghan,
Amigurumi,
crochet,
holiday crafts,
patterns,
Quick and Easy,
stuffed animals
Tuesday, June 14, 2011
Newborn Hanging Nest
My SIL Celeste made a request that we figure out how to make these hanging hammocks and "potato sacs" that are SO DARLING in newborn shoots. Seriously, if you haven't seen them before google newborn hammock photo shoot or something cause they are the cutest!
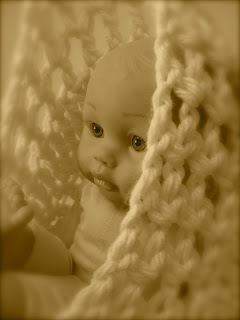
Anyway, so while we were in Boise with them, Celeste and I made up a pattern. The hammock didn't work out so well (I'm going to try again when I have more time) but the potato sac turned out good I thought. But to us it looked more like one of those round hanging bird's nests, so that what it's called.
Here's the pattern I wrote out. It's my first pattern ever so if it doesn't make sense I'm sorry. Let me know what to fix so I can get better.
I'm extrememly sad we didn't have an actual newborn to try this out on cause I'm not positive on the sizing but it's easy to make bigger if needs be.
And it's really more fun to do photo shoots with a real baby instead of your two-year-old's baby doll.
So I thought it turned out fun and I want to do more designs with different stitches. And maybe embellish it with a ribbon or flower or something cute like that.
Friday, June 4, 2010
Moby Wrap
There are a couple of babies being born soon so as I was thinking of what to do, I heard about Moby wraps. I guess I had seen them before but never paid much attention. But now...Oh I wish I had known about these when Afton was born.
So I "researched" them and found out all you really had to do was get a strip of fabric 20-30" wide and 5 yards long. and that's it. But I wanted these to be a little more...well, more. So I put a yard of cute fabric in the middle.
These are the fabrics I made the big ones out of
I didn't get a picture of the big ones on but I made a mini Moby for Jo and the babies loved it

Labels:
Gift Ideas,
Momma Projects,
Quick and Easy
Tuesday, May 5, 2009
Easiest Scubbie Ever
So as I was craft-blog hopping, I found the Sydney Hyperbolic Crochet Coral Reef blog and thus began the inspiration. I've been trying to find a good scrubbie pattern and there it was. The site is a place where people from all over crochet a coral reef as a "woolly celebration of the intersection of higher geometry and feminine handicraft, and a testimony to the disappearing wonders of the marine world." It's really cool all of the designs they come up with, so I made my own little coral to be my scrubbie.
Materials:
Peaches and Cream Yarn
Crochet Hook- any size (I used size H)
NOTES:
- sc=single crochet
- You can use any basic stitch you want
- Crochet in the front and back loops to make it sturdier
- Worked in one continuous round
1. Make a Magic Ring. (Planet June has the best photo tutorial for this. You'll never go back to the old way)
2. Crochet 2 sc in each sc
Ta Da: that's all
Repeat Round 2 until you feel like it.
Finish: slip stitch into next stitch and fasten off. Weave in Ends. Trim the middle yarn
It starts out looking like this

After a few more rounds, it starts to get wavy

You can stop here if you want, or keep going.

These are my finished scrubbies.
The best part about this is, you can make them as big or little as you want, or until you run out of yarn or time. The big one takes about 15 min.
You can make at least 4 or 5 out of the small Peaches and Cream ball. These would be good to give with a bottle of dish soap as a bridal shower gift.
Labels:
crochet,
Gift Ideas,
On-the-go,
Quick and Easy,
Tips and Tricks,
tutorials
Friday, March 20, 2009
More Stardust Shoes
I know there have been a million stardust shoes made and posted, but I was pretty darn proud of these camo ones I made for baby Logan.
PS Sorry I'm taking over the posts. I'll try to be more conservative.
Labels:
Baby Projects,
Gift Ideas,
Quick and Easy,
Sewing
Tuesday, March 17, 2009
Paper Bag Album Tutorial
Yay! My first Tutorial!! Good thing it's an easy one. Anyway, here's how you make the paper bag photo album:
Materials:
- 3 Regular paper lunch sacks
- Ribbon
- Paper
- Glue
- Hole punch
Optional:
- eyelets
- brads
- stamps
- Stapler
Take your three paper sacks, fold them in the middle and punch 3 (or however many you want) holes on the folded edge. You can also just staple the end if you don't want to do the holes.
Open the bags and stack them on each other alternating the open ends of the paper bag.
Then close them like a book and tie a ribbon through each hole, or staple it closed or you can also do brads or eyelets or eyelets and ribbon.
Cut out 12 5x5 pieces of paper, and 3 slightly smaller pieces of paper.

Decorate the pages and glue them straight onto the bag.
The three slightly smaller pages are the ones that will go into the open ends of the paper bags. Just cut them 5x5 and trim a little bit off.
Decorate them and staple a ribbon to the page (or punch a hole and tie a ribbon through it), so you can pull the page out. These 3 pages are good for journaling or just more pictures.
Thanks for letting me do a tutorial.
Monday, March 16, 2009
More for the Nursery
This is another idea I got from my sister-in-law. I bought the cheap little wooden letters from Roberts (I was lucky enough to get them al in the first try), quickly painted them and then sanded them.
My sister-in-law painted hers with a light color, then a dark color so you would see the light color when you sanded it. I just did it with one coat so I could see the wood.
I love this project. It took me probably 20 min at the most. My sister-in-law actually had them glue onto a board covered with fabric and then put them in picture frames (without the glass of course). It was so cute, but I didn't have the motivation to go that far so I just stuck them on the wall with sticky tack.
Paper Bag Photo Album
Thursday, March 5, 2009
Made: Softie lovies
I finally finished something! I can only do short projects anymore apparently. Tonight, I whipped up some new lovies after almost losing one. I made a miniature version of the brick pattern quilt (tutorial found here)
Put some super soft Minkie (aka cuddle flat) on the back with some taggies out the side and we are good to go...one for the baby and one for the wash! I just adore this Woodland Bloom fabric still...if only I could have bought a whole bolt of all of the fabrics in the line. *sigh*
Monday, February 2, 2009
A New Skill
Well, we'll see if it's a "skill" when I'm done :) Lisa taught me how to knit dishcloths so that will probably be something I do over and over again. It's really fun but I think it's harder than crocheting cause you have to handle two things at once. (Opree calls it multeetaskin'). Anyway, it's a new favorite.
Labels:
Knitting,
Quick and Easy,
work in progress
Friday, January 23, 2009
Made: board books
This is a very belated post. I made 4 board books for Christmas for the different babies in our lives. One for Jocelyn (8 months), one for Paul (18 months), one for Landon (6 months), and one for our newest little baby Afton (2 weeks at the time). I got the idea from Jill and got the books from blank slate board books. They send you the books and some labels and a CD with the template on it so that you can print directly on your labels...I took some photographs of the babies and their families and edited them with Picnik and then slapped them on... It was very easy and super fun.
When Jocelyn is older, I want to have her write and illustrate a story directly on the labels and "publish" her book. There are lots of fun things you can do with them. Here are the pages from her book. (I didn't finish the other ones in time to take pictures before they needed to be wrapped up and given away)


Monday, December 8, 2008
Easy Christmas Gifts/Decorations
Here's a super quick holiday gift or decoration:
1. Get a jar with a handle on the lid...these are $1.99 from Ikea.
2. Tie as many ribbons (in coordinating colors) as you can fit on the handle in a square knot.
3. Fill with candy, small ornaments or whatever else you would like! Ta-da!
You can also glue a ribbon around the edge of the top of the jar if you want. Easy Peasy.
1. Get a jar with a handle on the lid...these are $1.99 from Ikea.
2. Tie as many ribbons (in coordinating colors) as you can fit on the handle in a square knot.
3. Fill with candy, small ornaments or whatever else you would like! Ta-da!
You can also glue a ribbon around the edge of the top of the jar if you want. Easy Peasy.

Friday, October 17, 2008
Tutorial: Brick pattern quilt
This quilt is very self-explanatory, so you might say, "why make a tutorial for it?" I've decided to put a tutorial up for those of you who just need a little encouragement and a little guidance; this is for someone who is too hesitant to just try anything without instructions (like I used to be :) Buckle up friends, 'cause here we go:
Find your favorite line of fabric and buy a charm pack (or 2 or 3). What is a charm pack? It is a sample of each fabric in a line of fabrics that is already washed, ironed, and cut to a 5" square, and is made to look good together, thus making your job much easier. For this one, I used the blues and oranges from Lila Tueller's Woodland Bloom line, which I have been stalking all summer and it just came out!
Arrange all the squares to be how you want them on your design board (aka my living room floor). Make it as big or as small as you want, just remember that each square is going to end up being only 4 and 1/2" by the time you're done with it.
Next: take every other column and sew the squares together to make strips. Press the seams to one side or the other (usually toward the darker fabric so you don't see it as much). I pressed them all the same way going the direction that I was going to sew it together so the seams wouldn't get caught on the footplate of the machine...I'm lazy... what can I say!
Then, take the other columns that you haven't sewn together yet, and pick up the square on the end. Cut it in half and place one half on the bottom of the column and one half on the top. Then sew all these squares together into strips.
Sew all the strips together. Don't worry if the ends don't quite match up, we'll fix it later...that's the beauty of this design: no pinning or matching seams...lots of room for error!
Press your new seams to one side or the other:
Take your straight edge and rotary cutter and even the ends up:
And voila! Easiest quilt top ever! Quilt and bind as you wish and enjoy how little time that took! This makes the perfect gift because it took you all of one hour but it's a gorgeous thoughtful handmade gift that anyone will enjoy!
Here is this same layout in some different fabrics...This one is Moda's Nest:
Another Woodland Bloom with all the colors in it:
Moda's Portugal:
Moda's At Water's Edge:
And one that I can't remember what it is!
Find your favorite line of fabric and buy a charm pack (or 2 or 3). What is a charm pack? It is a sample of each fabric in a line of fabrics that is already washed, ironed, and cut to a 5" square, and is made to look good together, thus making your job much easier. For this one, I used the blues and oranges from Lila Tueller's Woodland Bloom line, which I have been stalking all summer and it just came out!
Arrange all the squares to be how you want them on your design board (aka my living room floor). Make it as big or as small as you want, just remember that each square is going to end up being only 4 and 1/2" by the time you're done with it.
Next: take every other column and sew the squares together to make strips. Press the seams to one side or the other (usually toward the darker fabric so you don't see it as much). I pressed them all the same way going the direction that I was going to sew it together so the seams wouldn't get caught on the footplate of the machine...I'm lazy... what can I say!
Then, take the other columns that you haven't sewn together yet, and pick up the square on the end. Cut it in half and place one half on the bottom of the column and one half on the top. Then sew all these squares together into strips.
Sew all the strips together. Don't worry if the ends don't quite match up, we'll fix it later...that's the beauty of this design: no pinning or matching seams...lots of room for error!
Press your new seams to one side or the other:
Take your straight edge and rotary cutter and even the ends up:
And voila! Easiest quilt top ever! Quilt and bind as you wish and enjoy how little time that took! This makes the perfect gift because it took you all of one hour but it's a gorgeous thoughtful handmade gift that anyone will enjoy!
Here is this same layout in some different fabrics...This one is Moda's Nest:
Another Woodland Bloom with all the colors in it:
Moda's Portugal:
Moda's At Water's Edge:
And one that I can't remember what it is!
Subscribe to:
Posts (Atom)