Find your favorite line of fabric and buy a charm pack (or 2 or 3). What is a charm pack? It is a sample of each fabric in a line of fabrics that is already washed, ironed, and cut to a 5" square, and is made to look good together, thus making your job much easier. For this one, I used the blues and oranges from Lila Tueller's Woodland Bloom line, which I have been stalking all summer and it just came out!
Arrange all the squares to be how you want them on your design board (aka my living room floor). Make it as big or as small as you want, just remember that each square is going to end up being only 4 and 1/2" by the time you're done with it.
 Next: take every other column and sew the squares together to make strips. Press the seams to one side or the other (usually toward the darker fabric so you don't see it as much). I pressed them all the same way going the direction that I was going to sew it together so the seams wouldn't get caught on the footplate of the machine...I'm lazy... what can I say!
 Then, take the other columns that you haven't sewn together yet, and pick up the square on the end. Cut it in half and place one half on the bottom of the column and one half on the top. Then sew all these squares together into strips.
 Sew all the strips together. Don't worry if the ends don't quite match up, we'll fix it later...that's the beauty of this design: no pinning or matching seams...lots of room for error!
 Press your new seams to one side or the other:
 Take your straight edge and rotary cutter and even the ends up:
 And voila! Easiest quilt top ever! Quilt and bind as you wish and enjoy how little time that took! This makes the perfect gift because it took you all of one hour but it's a gorgeous thoughtful handmade gift that anyone will enjoy!
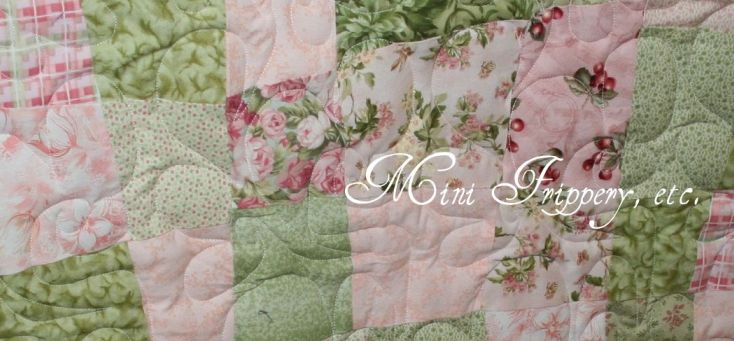
 Here is this same layout in some different fabrics...This one is Moda's Nest:
 Another Woodland Bloom with all the colors in it:
 Moda's Portugal:
 Moda's At Water's Edge:
 And one that I can't remember what it is!


8 comments:
I love that you balance out the time commitment with the thought being what counts lol! I'm a mom of 4, so I can always appreciate a perfect marriage of consideration for both your time and the recipient! Now if only I could find an hour to sift through my fabric cupboard and actually whip a few of these up... and not have them look like my 4-year old did the work... ~smirk~
So... My name's Hope, and I'm a photographer in Edmonton, Alberta, Canada. I was tagged by a friend for a meme and decided it'd be more fun to meet new people than tag familiar folks. I hope you stop on by and play along!
Alright!! I loved the ones you and Alley did. This sounds like something I could do a lot of and give them as gifts :) I think you made this one just for me cause there's no lining up and pinning involved :)
MMMMmmmmmm! Love that Woodland Bloom fabric!
Hey! I was wondering if i could use this tutorial on Gracielousquilts.blogspot?
Let me know at lolaagain @ gmail . com
I just posted this on www.gracielousquiltshoppe.com .
It is under "Tips and Tutorials"
Thanks for sharing!!
Wow- it looks so doable for a beginner to quilting- thanks!
I have never made a quilt before and am excited to try =) this looks so cute <3 so after this part is done, do u just sew it on top of a solid piece of fabric?
Yes, nikki. Just sandwich a pier of batting or flannel between this and the backing, then quilt or tie it with yarn, and bind it.
Post a Comment