


Under the Sea CAL: Summer 2026
3 hours ago
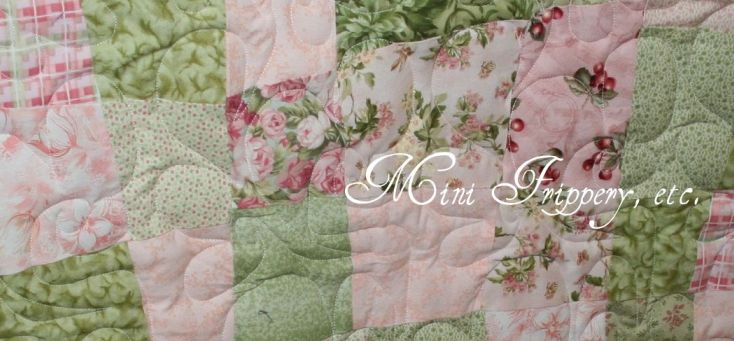


 close up of the quilting. This second quilt is done from this tutorial.
 This one is for my own bebe...I love how it turned out. Hopefully it will be a good lovey for her!
 So, many people have seen me working on this quilt and now it is in its final stage. Here it is.
 Then cut each pair of fabrics into 4"x4" squares. Move them carefully into a stack so they don't separate.
  They're completely ready to sew at this point. Cut all your fabrics this way and lay them out next to your sewing machine so you can sew all of them at once.
  Stitch one edge of each of the squares together with a 1/4" seam allowance. All seams in this project are 1/4". After you sew the first piece, don't cut the thread, just feed the next piece in and keep going until you've finished all of your squares. This method is called chain piecing. It saves time and thread. I separated the pieces a little more than usual so you could see what was going on.
 Now you have your twosies. Cut the threads between each one and press all seams toward the darker fabric so that it doesn't show as much once you're done.
 Do that to all the pieces and then lay them out again by your machine so you can see what you've got.
 Then take two of your twosies and sew them together to make a 4 patch. The only pinning I did was to just pin the two pieces of fabric together where the seams meet to make sure they line up. It's best if each block is different so you get the random look when you're done. Press seams.
 Then take your 4 patch blocks and sew another twosie on top of it to make a 6 patch. Press seams.
 Then take the fabric that you really want to show off (in this case a yellow and blue toile), and cut it in strips of 4"x11". This will make up the third column. Sew it onto either side of the block, on the side that has 3 squares. The finished block looks like this:
 You may have to do a little bit of trimming to even up some of the sides. Then lay the blocks out on your design table (I like to say that because it makes me feel like Fons & Porter, but really I just lay it on my living room floor) and move them around until you are happy with how it looks. As I said before, there are a lot of variations in how you can put them together. You can do something more random:


 Once you decide on a layout, sew the blocks in one row together and press seams and do the same for the rest of the rows. Make sure you're lining up each seam.
 Then sew the rows together, and press the seams. Again, make sure you line up the seams. If you don't want a border, then you're done! Quilt or tie and bind as you like. If you do want a border then you're almost there! You can put as many borders on in whatever thickness you like. I did my inner border 3" wide and my outer border 6" wide. Cut your fabrics into 3" strips and sew as many strips as you need to cover all 4 sides. Repeat for the outer border. And...
 Voila!! You are finished. Quilt or tie and bind as you like. I'll post a finished product picture once mine gets back from the quilter.
 Next: take every other column and sew the squares together to make strips. Press the seams to one side or the other (usually toward the darker fabric so you don't see it as much). I pressed them all the same way going the direction that I was going to sew it together so the seams wouldn't get caught on the footplate of the machine...I'm lazy... what can I say!
 Then, take the other columns that you haven't sewn together yet, and pick up the square on the end. Cut it in half and place one half on the bottom of the column and one half on the top. Then sew all these squares together into strips.
 Sew all the strips together. Don't worry if the ends don't quite match up, we'll fix it later...that's the beauty of this design: no pinning or matching seams...lots of room for error!
 Press your new seams to one side or the other:
 Take your straight edge and rotary cutter and even the ends up:
 And voila! Easiest quilt top ever! Quilt and bind as you wish and enjoy how little time that took! This makes the perfect gift because it took you all of one hour but it's a gorgeous thoughtful handmade gift that anyone will enjoy!
 Here is this same layout in some different fabrics...This one is Moda's Nest:
 Another Woodland Bloom with all the colors in it:
 Moda's Portugal:
 Moda's At Water's Edge:
 And one that I can't remember what it is!
 Check out this little cowgirl/boy bib I made from an old pair of jeans and a scarf...yeehaw!
 I finally finished two projects this last weekend (only because they didn't take that long to begin with although it took me about triple the amount of time it should have) And also here are some other projects that got finished this weekend. I first posted pictures of the fabric for Lexie's graduation quilt on April 29th (I'm not kidding...) And she finally finished it on Saturday! Here she is resting her tired quilting head on the machine for emotional support...
 And here's the happy quilter with her first ever made-by-her quilt! Congrats lex! It's so darling!
 Close up of the quilting
 Amalie made this out of scraps lying around her house for my bebe...Thanks Amalie!
 And last but not least, I made this for the bebe to wear when she goes with me to the studio to choreograph...She's got to fit in with the other dancers!
 Notice her ballet slipper socks, too! If the thought of putting on a tutu again didn't fill me with dread I'd get our pictures together, but her chubby legs are much cuter than mine!
