---Revised---
Jan. 8 2013
I made a video tutorial and posted it on Youtube here
http://www.youtube.com/watch?v=k7FIHaz9cvw&feature=youtu.be
It's my first video tutorial so be patient :)
----Revised----
Aug 28 2012
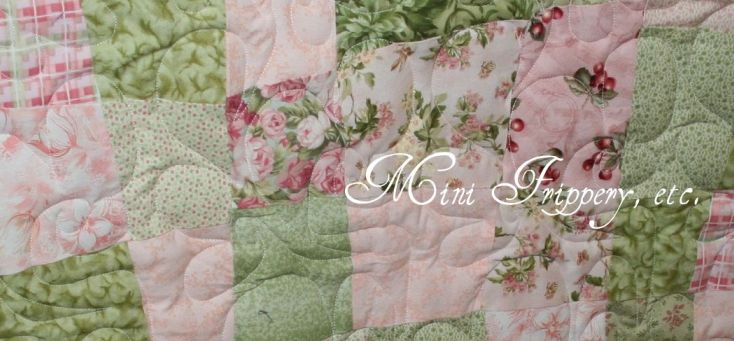
This is the Blanket Grandma Turner (Tyson's Grandma) made for Afton when she was born. Since then I have been trying to figure out the patter because it's so amazing!
Jan. 8 2013
I made a video tutorial and posted it on Youtube here
http://www.youtube.com/watch?v=k7FIHaz9cvw&feature=youtu.be
It's my first video tutorial so be patient :)
----Revised----
Aug 28 2012
This is the Blanket Grandma Turner (Tyson's Grandma) made for Afton when she was born. Since then I have been trying to figure out the patter because it's so amazing!
Yes, it would have been easier to just ask for the pattern but it was fun trying to figure it out on my own.
Well, I finally did it so I thought I would share because it really is one of the neatest patterns I have ever seen. It gives the afghan a 3D look and I love it.

So I kind of came up with a pattern but it was kind of hard to explain so I decided to do a picture tutorial. (also, I always wanted to try a picture tutorial) It's not the best but here it goes.
This is the actual pattern I came up with:
Here's the revised version to try and make it easier to follow
Here's the revised version to try and make it easier to follow
Grandma's 3D Baby Afghan
Hook Size H
Lion Brand Pound of Love: pastel Pink
Row 1: Using this technique of a no chain foundation, 122 dc. Turn
Row 2: ch 3 (does NOT count as dc), 3 dc in next dc. (ch3, sk next 2 dc, 3 dc in next dc) 40 times. DC in last dc. Turn
Row 3: ch 3, 3 Bpdc in the first dc of 3 dc set. ch 3 [working behind the ch 3 of previous round, 3 Bpdc in 1st dc of 3 dc set, ch 3) 38 times. 3 bpdc in 1st dc of last 3 dc set. Dc in last turning ch of previous row. Turn
Repeat row three until desired length
Last row: ch 3, (dc in next 3 dc, dc in ch 3 sp ) repeat to the end of the row. Dc in last turning ch. fasten off and weave in ends.
Photo Tutorial:
Starting on Row 3-
Ch 3. Yarn over,

Going behind the ch 3 of previous row

bpdc in the first dc of next 3 dc set

(Going around the front of the stitch)

(Yarn over, pull through, finish dc)

When making the next bpdc in the set of 3, do it the same way but make sure the second one goes on top of the first one, not beneath it. (which mean you may need to pull down the 1st st in order to get the second one on top of it) So the three stack on top of each other. You'll get a totally different look if you do the dc under the previous one.

Here's what it looks like when you just finish the 3 bpdc

This is what the back side looks like

ch 3 and repeat till the end. Then dc in last st (it's the turning ch 3 from the previous row)

This is what the edging looks like

And here's a few rows done

Wow that was not an awesome attempt to explain that but I hope it helped even a little. I love this blanket and I think I'm gong to make lots. It goes pretty fast too.


163 comments:
Beautiful! Thank you for sharing :)
I love it! I'm definitely making one! Or two...
Thanks for taking the time to do the photo tutorial. That will help me especially since its been so long since I have read a pattern
So cute.
I love it! I'm going to go try it out in a few minutes. I'm just wondering with a pound of that yarn what were the rough measurements?
Mine is about 43"x36" And I think it takes more than the one pound. I think it's a bit big though and I could have gone with a smaller one. Depends on your preferences
Lovely stitch pattern! Thanks for sharing and for making a tutorial! I know how much time and energy you put in that. Thanks again!
Hello! I came across this pattern just love it! I am the editor of AllFreeCrochet.com and would love to feature your tutorial on my site with full credit to you. I know my readers would love it as well, and in return would generate some nice traffic to your site. If you agree and would like us to feature your project, our readers will simply click the link to your blog to get your full tutorial. It's really that simple. Please let me know if this would be ok. I look forward to hearing from you!
Jenny
Jbenoit@primecp.com
having trouble with losing a set. please post original pattern.
I don't have the original pattern. I just made this up while looking at the afghan. Sorry. If I can help I will.
I am new to crochet!! So, excuse a silly question, but what does Bpdc mean? I got the last two letters is double crochet, but what does BP mean?? I think I may make this for my soon to be born granddaughter! It is just lovely.
Thanks for answering!
Back post double crochet!! You can find some quick and easy guides on google. Hope that helps!!
I've just started this pattern and absolutely LOVE it. I will certainly be making more than one. Thank you so much for sharing :)
Thanks for Answering the BPDC there are some great youtubes out there to show how to do it. And thank you Andrea, I hope you like it
Just love it and it is so easy all the ladies at my craft class love it too. thank you so much
I cant wait to finish all I have going on just so I can make this as its gorgeous!! tired of all the granny ones...lol love,love,love this one !! Thank you for sharing it!!!
Thanks for a beautiful pattern took a while but I mastered it. thankyou for sharing with us. God bless you
Rose
sweden
I also had trouble figuring this out, but the finished product looked so fun that I persevered and FINALLY this morning discovered the error of my ways. I'm loving it!
Marilyn
Monterey Bay California
I'm glad you are all figuring it out. It's not the best tutorial
I lose the first set of 3 dc...as when you move to the 3d row you have to skip the first set as there is no chain 3 to go behind until you get to the second set of 3dc. When you do according to pattern your 3d row has 39 sets.....are you to put 3dc in the first stitch after your turning chain 3???
Cher, don't worry about not having a ch-3 to go behind. Just go to the 1st bpdc (of the 3-bpdc group of the previous row) and do the 3 bpdc.
Marsha
This probably sounds really stupid, but I don't understand what a 3D blanket is??? Sorry. Are you trying to say its a hooded blanket?
Please reply to yarnhooker2561@comcast.net I am really curious to know
Thank you for clearing that up. I think I need to re-write the directions. The first 3dc set on the row does not have a ch 3 to go behind. It's just on the first st after the turning ch. Then the rest of the row goes behind the ch 3s.
I have about 10 inches of a blanket done, and it is a really neat pattern. I discovered early that instead of trying to bpdc 3 times and stack them from the top, it is a lot easier to turn the piece over, get hold of the post and do 3 dcs on it. It creates the same stitches and is just easier than trying to stack them. It would be hard to explain this to someone, but it's easy to show.
I took a sample of your pattern to my crochet group last night and they loved it. Thanks for sharing.
Marsha
I am having trouble with the final row. I followed the pattern and the result was a wider, bunchy row. The wholes in the work didn't match the other rows. Could you please advise. Thank you
Make sure you're doing only 1 dc in the ch-3 space. It's dc in each of the 3 dc's and 1 dc in ch-3 sp.
Marsha
If you need to skip the dc in the ch 3 sp I'm sure that would be fine too.
How many yards...skeins in a pound?
There's about 1,020 yards in a Pound of Love Skein, but I think I used a little more than that, like maybe 1,200-1,400 yards.
I just tried this with some scrap yarn to see if I could do it (I've been crocheting a long time but don't experiment much & have never used a pattern). I LOVE IT :-) It's beautiful and easy enough for me to do, although I had to research the bpdc. I only started with 24 initial dc stitches and my edges do seem to be reduced from that so when I actually make full size I'll be sure to count everything more carefully. Thanks for this!
I love this afghan. I'm trying to make it and I usually can figure any crochet out but no matter what I've tried I cannot figure out the ends. I'm going crazy! Can anyone please explain what to do at each end. I'm so tired of doing a couple rows and tearing it out over and over again. Thanks, Lin
What a nice afghan! Thank you for posting this!!!!
Also, this is my first visit to your blog and it is great!! :).
______
Lee Ann H
Crochet...Gotta Love It! Blog
Crochet...Gotta Love It! Website (crochet names and rosary patterns)
For the edges: When you start a row, you ch 3 and then 3 dc, so it will be like there are 4 dc close to each other. When you get back to it when you are ending a row, there will be the 3 dc that you do your 3 dc in, and THEN you do ONE dc in the turning ch (the ch 3 you started with). I know that all sounds confusing. If you need more help let me know, Maybe I'll figure out how to do a video. I'm not that talented but I can try :)
You don't even know how much a video would help me!
Thank you for your generosity .
Happy New Year. :)
This is the most fascinating pattern I've ever seen, and I've been collecting patterns for years. Looking forward to making this. Thank you so much for your time and effort in sharing this.
I love this pattern the st looks complicated but is really easy, I made this st in a scarf n it looks very nice.
I'm going to try this as a scarf with a soft yarn... will let you know.
I love this blanket and am gonna try doing it for my grand daughter to be born next May. It seems easy to execute. However I live in Montreal and do not know how much yarn I should be getting in weight, etc.. You talk about yards, is it the length or goes by weight?
Thank you for answering. Thank you for your generous explanations.
Absolutely beautiful! If I posted a link to your blog from the item, would you allow me to sell this in my etsy store?
Monica- yes you can sell whatever you make, I would love for you to put a link up.
Anonymous in Montreal- I used a little more than a one pound skein of yarn.
It is wonderful, facinating and just magical. I fell in love with it after only 3 to 4 rows. Thanks so much for sharing this pattern.
I have made and gave away many many baby blankets. My daughter is having her first baby, a boy. So I was looking for something different cause this one had to be special. I love this pattern, the blanket turned out beautiful!!! Thank you so much for sharing!
My older son received an afghan in this stitch from a friend of my mom's. I have been meaning to get the afghan out of the attic (he's 13 now and not into pastel baby blankets lol) to figure out the stitch. Now I am hoping not to, I'll be trying this soon!
I have just finished this beautiful afghan for my new grandson who's due any day. I just love it and your video tutorial made it so easy. Most of the patterns I had looked at were very "feminine" as I had crocheted a blanket for each of my granddaughters I was so thrilled to find just the right thing for my first grandson.
Thank you so much.
Thank you!!!
Yes that is easier... in the video she shows 2 different ways... stacking it or turning
laurie
This looks brilliant!! The videos are fantastic... Definately my next project.... my only question...... How much yarn will I need?
I used a bit more than a pound of love. I think I used about 1200-1400 yards.
Hi I love this pattern and its lovely. I also would like to give you a heads up about something that seems to be on your website. I use Google Chrome and it stopped me from coming into your site saying it had malicious content..ie malware and spyware. It also said there was 2 trojans. I am guessing it is somewhere in your links. I came into your site at my own risk so I could see what you have here. Not only do I love to crochet but I have also developed web pages and somehow you posted a link thats bad in some way. If you have someone else creating your site please have them check for these viruses. I wold really hate for your site to be removed for continuing with malicious content. I hope you can resolve this issue.
Thanks Marsha! I found out It was because we had a link to a blog that had been flagged, so I got that taken care of.
oh awesome you got it resolved...it worked because I just came straight here without the warnings..ty so much for fixing that and sharing such great creations
I love this dimensional crochet stitch! You should be proud of yourself for figuring it out!! It would make a terrific scarf, too.
Hi, thanks for the pattern, I have had some wonderful compliments on the blanket.
Thank you. I'm so glad you liked it.
I have been looking for this stitch for a long time! (about 20 yrs) Im so glad I found you on pinterest.
Its been about 20 yrs since I crochet a blanket like this. I lost pattern,so glad I found you on pinterest!
I just wanted to say thank you for this beautiful pattern. I just finished working it into a baby blanket for my soon-to-be-born great-nephew. It came out beautifully, and I'm sure will be unique among the baby gifts. Plus it works up so quickly. One week from start to finish, and that's only working at my leisure.
Thanks again for sharing!
I just found this pattern tonight, while trying to find a new one to attempt for a firend of mine who is expecting. I am a self-taught crocheter, and I typically use picture and video tutorials on the first attempts. This pattern is beautiful! I watched a video on the BPDC on YouTube and Row 3 was easy-breezy! Once I got the first 2 clusters of 3 BPDC done, I could see the pattern coming to life and knew that I had mastered it! Thank you so much for posting this, especially for FREE! I think this will be my go-to baby afghan pattern for quite a while! :)
This is so unique!!! Exquisite. I just love it. I however had a difficult time trying to execute it. After numerous trys I finally figured it out (yeah). I found the video/tutorial and that helped tremendously. Thanks for that!! Having a visual aid was a godsend. It is really an easy pattern once you know. I am expecting my first godchild and wanted to make something special and this is perfect. Thanks again for your time and effort and sharing. God bless you. P.S. I am also considering doing a video with all the mistakes I was making and what I did to correct them that may be beneficial for folks like myself. If that's okay with you???
That would be just fine @huggybear. I'm sure people would be able to benefit by that video. Glad you figures it out!
What a beautiful pattern. I'm going to make this for my grandbaby which is due in August. Can you tell me the multiple of stitches use for this, I want to make it smaller than what you have here.
First off I love this pattern and plan on making it for my grandbaby. Can you tell the multiple of stitches used because I want to make it smaller than what you have here, thanks.
I believe you just make the stitches in threes.
This is an awesome pattern. You did a great job explaining it. I love it. Thanks so much for sharing it
Just watched your video tutorial for this beautiful blanket. I had to subscribe so I could tell you what an awesome job you did on the video. You went at just the right speed in order for others to learn by it. Best tutorial I have seen. Thanks so much. I will be making this for my first great-grand daughter.
Avalee
Thank you so much for this beautiful pattern. I am making two for my soon to be twin grand-daughters. The no chain foundation is brilliant, It always bothered me about the tension in the chain. I have been crochteing since 7 years old and this is the prettiest baby blanket I have come across. Thanks again!
Well I started this afghan & hopefully it comes out right,might question is do u still block it after getting done.Thank you
wow!!! fantastico!! grazie.... thank you very much!! very nice. I will do it....
Hi there...I too appreciate your pattern and video tutorial. My mom taught me to crochet but she is no longer with us. I never could read crochet instructions so I would just go to her and she would show me what it all meant...I knew how to do everything, I just didn't understand crochet lingo. :-) So when I read the instructions, I thought I would never figure it out, but then watched your video and by-golly I already have about 10 rows done in one sitting! :-) I love this pattern - I wish I could share it with my mom though. :`( Thank you for sharing your pattern and then going above and beyond to teach it to us!! God bless!
I have one suggestion about "resizing" your pattern to fit individual needs. If I am correct with my thought process [and my math] :-) your first row must always be a dividend of 3 then add 2. I am making a baby sized afghan and wanted it to be about 30" so my first row ended up being 92 stitches...worked out perfectly.
Very pretty. I have a baby shower coming up and would love to make, but since this process is new to me and I only have nine days to complete it I'll try it in the fall.
I tried your pattern - It is beautiful. I have made a couple of baby blankets with it. Thank you for the pictures it really helped a lot. Thanks again for sharing your pattern with us. I think it has become my favorite.
I absolutely love this pattern. I am making it for a friend's baby and it is turning out beautifully. I have one question though. I cannot tell from the pictures if you did an edge all the way around when finished. If so, could you please tell me what you did. If not, I think it is fine without it.
Thank you all! I'm glad you like it :). I didn't do anything on the sides because I thought they finished nicely by themselves.
Awesome..thanks so much....your video was great..good job....step by step, very easy and finished product 'beautiful'....
(from a Canadian crocheter)..
I have just come across your pattern and cant wait to try it out. I have only been crocheting for a few months so I am so thrilled that you have made it with a video and pictures so even I should be able to make it. Because the pattern is basically 3 rows I should be able to do it in my sleep after a while lol. Thank you for making it for free and putting so much effort in for others to be able to make it.
I live in Manchester England and love Pintrest and the allfree crocheting ect. It seems like you have loads more intresting groups in America than we have here.
it is a beautiful baby blanket, thank you for sharing, I am making it for a friend I know she is going to love it
Hi, I am loving this baby blanket ....but I keep losing the edge, can anyone tell me what I am doing wrong, frustrated.
The middle looks fantastic but the edges are all over the place on either side.
Hi, well I am pleased to say I managed to sort the edges out and I have finished the blanket, I made mine a bit bigger because I want her to be able to use it for years to come.
Thank you so much for sharing this pattern, the tutorial made it easier to follow and the fact you slowed right down to allow total beginners like me to be able to do this I cant thank you enough.
Can anyone tell me how to figure out what the stitch us a multiple of? I'd like to make a full size afghan but don't know how many FDC to add to make sure it comes out right. Thanks!
Thankyou so much for sharing this beautiful pattern. I am making it for my new grandson Jack and it is gorgeous. My mum who is 80 had packed her hooks away but is now busy with your pattern. We are both loving it.
I really think is a beautiful design and all however I my self think when you make this blankets for baby´s is basically for a family member. Do you sell this blankets and about do they go for. Alot of people don't want to pay the price for a hand made blanket or due they?
This is beautiful and I am so excited to make it, but I want to be sure I am doing it right before I get too far. When you start row 4, where are you putting the bpdc? Does it go in the row that appears to be towards the front or the back? I am not quite able to tell from the pictures and the video doesn't really show it. Thanks for the help!!
I can't wait to try this. Your tutorial is great, it cleared up any questions I had. Thanks for sharing.
Wow! Thank your for sharing this wonderfully unique stitch pattern, the tutorial is excellently explained and easy to follow, I had no trouble at all following along. I like it so much that I will make lots of things with this stitch besides an afghan. The possibilities are endless.
I have to try this! Ty!
I've got to try this! thank you!
thanks for the pattern-it is just soo delicate looking-going to try it
Thank you so much for the pattern. I made a fluro multicolour one for my niece and it was gorgeous pattern to make.
Thank you so much. I just finished it with a pastel varigated yarn, using a "J" sized hook. I love the look. I have been making afghans on and off for over 40 years, and this is the favorite one I have ever made. I appreciate your sharing it with all of us.
I made this with peach color yarn and it came out beautiful! I found the pattern to be easy to follow. I also have to say it is one of my favorite baby afghans to make. I gave the first one I made away and I plan on making another one.
I am very new to crocheting. Sorry for the stupid question... But how can you do the double crochet without a starter chain row. Help please I really do not understand. Thanks in advance.
There are a bunch of videos in YouTube I followed. You can just do it with a started chain though I it's easier. It doesn't matter which way. :)
Ps. Thanks all for the frat comments! Wish I had the time to respond to them all. I'm glad this pattern is getting some great use!
I have experimented with the last row (on a smaller scale so I could better see the difference between the first and last rows) and my conclusion was this: ch 3, 1 sc in ch3space, 1sc in first of group of 3 dc, skip one, 1 sc in last of group of 3 dc. repeat til the end, 1 sc in last on ch3 from previous row.
Then, I turned and ch1, and did 1sc in each sc and finished it off. That was the closest to the first row I made.
in simpler terms, instead of dc, do simple crochet, and instead of doing one in each of the 3 dcs, just skip the middle one and make one last row of sc to finish it off.
hope it's helpful to someone!
sarah
It's a beautiful pattern, thanks so much for sharing! I made it for a friends baby and even though she loves it she won't give it to the baby until he is older, she said it was awful for getting fingers and toes stuck in. SO, next one I will use a smaller hook!
Just tied it out as a quick scarf.I think it's very generous of you to put the pattern out there for all of us needle hounds thanks carrie means
I have been looking for a special lacy afghan pattern everywhere. I am making this as a bedspread for a special friend. Good job with the pattern and the video!
After row 3 how do I start and where do I start row 4?
Also, wanted to say thank you so much for this beautiful pattern. I am new at crocheting, however, the video that you provided made it so easy.
However, I am lost after row 3. Where and how do I start row 4 and on?
I too am at a standstill on starting row 4, but I am left handed and have done the majority of this pattern backwards. So far it looks like the pictures, but I can't seem to figure out row 4 beginning.
ROW 4
All you do is repeat row 3 over and over till its the size you want
ch 3 [working behind the ch 3 of previous round, 3 Bpdc in 1st dc of 3 dc set, ch 3) 38 times. 3 bpdc in 1st dc of last 3 dc set. Dc in last turning ch of previous row. Turn.
So chain 3 then double crochet in back post 3 times, chain 3 and repeat till end and keep doing this .
I hope this helps you
If you are left handed try looking sat the pictures through a mirror
Thanks Linda! Yes, you just repeat row 3 until you make it big enough for your taste :)
I found your pattern on all free c. I am making this right now & I love it!! I looks complicated but it is very easy & goes very fast, thank you so much
I am definitely making this beautiful great-grandchild (not sure if boy or girl yet). My granddaughter lives in FL and she said the lowest temperature in winter is around 60 degrees. Can I use a 3-ply baby yarn to make the afghan? Thank you so much for the picture tutorial, it makes the pattern so much easier for me to understand!
i am doing this blanket right i know but it sure does not lay like the finished one you show what am i doing wrong thanks diana skaggs
I just started this blanket. The directions and photos were easy to understand and follow! It took a bit for me to see the 3d effect and I'm glad I stuck with it. I'm doing it in white, and I LOVE it!!!
This is a lovely pattern and the instructions and pic tutorial really helped. Thank you.
When I made this pattern for the penultimate row I did the 3 bpdc as per pattern, but omitted the three chain between each 3 bpdc. This way, when I did the final row of cd all the way across I dc'd in to the tops of all the bpdc only. This alteration to the pattern means all the stitches then equal what the pattern started with and avoids the frilly top edge!
Hope this helps others making this pattern.
I just finished your pattern. It is a lovely 3 dimensional blanket and I am certain my sister-in-law is going to get a lot of use out of this beautiful baby blanket. My only issue is that the first and last (edging) rows don't match at all. Next time I use this pattern, I will start it with a traditional row of chain stitches. It might need an additional row of double crochet before beginning your pattern. I will have to experiment with it a bit. Anyhow, thanks for posting this!
I like the look of the blanket an want to make it, question is you name the brand of yarn but don't say how many skeins required. Will just one do the blanket? Please reply so that I can buy and get started.
randkfarms@comcast.net
I agree with the ladies....BEAUTIFUL!!
I watched it on YouTube as I learn better by watching than reading a pattern. Thanks so much for sharing My oldest dtr is having our first grandchild!! Guess what I'm making for her? So excited.
I made this for my niece's baby last year, and I decided it was my favorite afghan I've ever made. I made it with varegated pastel yarn. I am making it again with 3 ply pastel, pink,blue,green, yellow and white for a new baby without knowing the gender. I think it is the most special and fun pattern. Thank you so much for sharing this fantastic pattern.
I love this pattern. I am working on one in I Love This Yarn Arctic Ice, beautiful. But I too am concerned about getting to the last row. I like Knitknotcrochet's idea of not doing the chain 3s between the last for of back post dc, then a row of just doubles. I'll probably try it that way. Thanks for all the comments. I got alot of ideas so it was worth reading through.
I love the way this stith looks, do you think it would work for a scarf or shaw? I'm trying to get a early start on Christmas gifts and I want to make my best friend a long shaw or scarf and this is perfectly beautiful.
Susan Mooney
Wonderful pattern! Thank you so much for sharing! Using it on a blanket did me grand baby!
This is simply gorgeous thank you so much for sharing.
I love the looks of this pattern. I'm going to try to adapt for a scarf. Thank you,
Wow, I love this! I just saw it posted on All Free Crochet's Afghan site! It is beautiful and I am definitely going to try it. I was not sure what size the blanket turns out, but if I used a chunky weight I could make it a bit bigger and even faster. I think this is going to be one I make several times, once I get the hang of the stitches:) Thank you so much for sharing!
They have a tutorial for this stitch on youbute I made a couple scarfs for my daughter before its beautiful and 3 -D
I posted these videos in 2009 perhaps help.
http://crochedadodo.blogspot.pt/2009/09/mantinha-verde-e-branca.html
And here had already posted good 2015
http://crochedadodo.blogspot.pt/2009/07/cachecol-azul.html
Please help me understand how you get 122 double crochet stitches without first making a chain. I have never heard this before.
Just found this 3D pattern of yours and it is truly wonderful. So easy to do. My question to you is how much yarn did it take to make the blankets you are making and what will the finished size be?
Great instructions, By the way,
For people wanting to know about starting without a chain - google "foundation double crochet"
Great instructions for a first time pattern poster!!!
Just found out I'm going to be a first time grandma. And came acrossed this patteren and this will be the first of many blankets I made for the little peanut :-) thank you so very much for sharing this it is just beautiful. MeMa KaKa
I have made many of this pattern blanket. They have been in a rainbow of colors, too. But one stands out because I was working on this one on board a cruise ship out of Italy. An Italian grandmother was watching me from afar. She finally came over to me and sat next to me and began to handle the finished apart. I spoke no Italian & she spoke no English but we both spoke crochet. She sat and watched me for a long time noting down the stitches as I executed them. I went very slowly so she could see clearly. So, who knows, but your beautiful blanket just might be being made in Italy now!
Wow! Your article is great, useful and very informative! Check my useful articles too:)
http://about-crochet.kjwin.com/
http://about-crochet.kjwin.com/aboutcrochet-clickbank.html
Love this quilt did any one add a border? if so what stitch did you use ? love to hear from you I have just discovered this pattern
My aunt gave me this pattern years ag. I made it into a sweater for my fist grand daughter 23 years ago. I had also entered in the country fair and won first place. My aunt had alway made it into a shawl, stating on point. I have picture of sweater if you want to see.
I love this! It's so pretty I want to make one for myself! Thank you for sharing.
I just finished your pattern. It's beautiful it's one of my favorite baby Afghans. Thank you so much for sharing
I'm left-handed, but going to give it a try. Any other lefties tried it yet? Any hints? I think the pattern is absolutely beautiful. So nice that it's different also.
I am also left-hand & to do it, I tried reading and crocheting it over and again,I finally picked up on it. It's a great different pattern. Wish I younger to try and do unique crochets.
So cute! thank you
Thanks for the pattern. The video helped me a lot. I love it!
Hello, I just wanted to say thank you for the pattern and picture tutorial.
It is easy to read and follow.
I so love this pattern, I was looking for something special for my soon to be born 5 grandbaby, a little boy, and since I just turned 50, I thought it called for something I haven't done before, I've done a lot, yours was the best one I could find, so thank you so much!
As you said, it works up easy, and it's a very beautiful pattern too!😊
Thank you again!
Betty Jo
I love this pattern and working on one now. I was wondering if you have ever tried changing colors to see how it turns out? If you have I would love to see some pictures.
Thank you,
LauraBeth
its looks like to http://ellej.org/uzory/volny-okeana/
yes?
very good!
the afghan looks fabulous and I do have some success with making it but a video would help immensely. Is there are video I could watch. I see the last comment was over a year ago
The link for the video is at the beginning of the post :)
Hi thanks for directions and video. How many multiples would you need to do to increase the size of the afghan with this stitch? I tried doubling to 244 and I think it's too long. Thanks in advance.
I have made two of these wonderful afghans. I love to feel the texture of this pattern.
When working on one on an airplane trip, it drew SO much attention from flight attendants and other travelers - all fascinated with the beautiful pattern.
This is a beautiful blanket. You are so creative!! I haven't started one yet but it's next on my to do list after I finish the two Wip I'm on now. Thank you for sharing. I have 13 dgks some are already adults and others are growing up fast so I'm sure there will be a lot of great grands to make these for.
BEAUTIFUL! You explained wonderfully! I was able to follow step by step! Thank you!
I just finished the blanket. Everyone is amazed at the pattern. However it did come out a bit narrow. I would use more than 16 oz of yarn, or shorten the length to about 30 groups of 3 double crochet. I'm going to make another and try it with trebles or a larger hook. I loved working this pattern. Thanks for the video. I'm an experienced crocheter and even I found it difficult at first. Don't give up if you find it difficult! It's a beautiful pattern and well worth frogging it back a little if you mess up. Just remember to count at the end of each row! You'll love your finished project!!
Thank you!
I have never heard of ((No a stich foundation)How do you do this.I am trying to make this for my granddaughter
Thank you for the baby blanket . I love it.
I love this pattern. It is my "go to" choice for baby showers. It is so pretty And elegant but easy once you get the hang of it. Thank you posting! Thanks to All Free Crochet for sharing it with a wider audience.☺
I have made this blanket several times. The last time I used two colors and changed at the end of each row. Your unique blanket became even more unique being a different color on each side. Thank you for sharing this wonderful pattern
What is the chain multiple when making the foundation chain ? I would like to make this blanket bigger.
Hi, I loved your pattern when I found it, and taught myself to crochet so I could make it for my grandson! The stitch was a little tricky for a newbie, but I finally got it!! And made the whole beautiful blanket!! But I see an area kind of in the middle, where some stitches don't seem to be holding!!! I'm very concerned, as I don't want to rip it out!!! But neither do I want to gift it with a defect!!
I have found a site on line for fixing a regular double crochet 'hole', but do not know enough to translate that into fixing a
bpdc problem. Please can you help me????
Thanks
Good post. I learn something totally new and challenging on websites I stumbleupon everyday. It's always useful to read content from other authors and practice something from other sites.
Great site. Lots of useful info here. I'm sending it to some friends ans also sharing in delicious. And of course, thanks for your effort!
Office.com/setup | Activate Your Office Setup with Product Key
We publish blogs about Microsoft Office software, such as how to use them, how to install them on various devices, and how to unlock them. As we all know, Microsoft Office is a huge piece of software, and users sometimes run into issues when attempting to install it. We've already published several articles on how to resolve these issues and quickly install Office on your PC.
Visit the below links to get it resolved:
setup.office.com
www.office.com/setup
view/office-settup-com/home
office.com/setup
office.com/setup login
we are living in a digitized world, and all of us can get everything done within minutes. The same is the case with Garmin Nuvi Updates.If you are interested in Garmin Nuvi update then this is the place to go. If you find any difficulties in updating the gadgets, then Smartgps eco is very helpful. The smartgps eco will be helpful with most current software and updates.
FuboTv needs no introduce and when it comes to watching an all live sports channels. Still not signed in to FuboTV! Well, you might be missing out on on-the-edge soccer tournaments or a nail-biting basketball game. If you have already activated yourself on FuboTV, then prefer using an email for FuboTV login or if it’s your first time with FuboTV, then choose the Sign in With Code option.
fubo.tv/Connect
Open your web browser and enter http://dlinkrouter or http://dlinkrouter.local or http://192.168.0.1 into the address bar. Enter the D-Link Router default password and username and click login. Then click on the Setup tab at the top and click Wireless Settings on the left side. Click on Manual Wireless Network Setup. Scroll down the page to "Wireless Security Mode".
Hi There,
Thank you for sharing the knowledgeable blog with us I hope that you will post many more blog with us:-
Pug will happily spend much of the day snuggling on the sofa’”which, combined with the breed’s fondness for eating, makes obesity a real possibility. But the Pug is playful, sturdy, and lively, too, and owners can keep the breed fit with daily opportunities for moderate exercise, such as walks or play sessions in the yard.
Email:frenchiepugsforsale@gmail.com
Click here for more information:- more details
At Ledger we are developing hardware wallet technology that provides the highest level of security for crypto assets.
ledger live
ledger live
Hi I found your beautiful blanket through Ravelry. I came to your website to see what else you might have, and see you’ve made a video help. It’s not linked or even mentioned on the Ravelry pattern 😔. I wanted to make you aware of this so you can hopefully get the video linked up. I know I’m going to need it and I’m sure others will too. 🙏🏻
Post a Comment